
10-Min Resistance Band Workout for Beginners to Lose Weight Fast
Are you ready to kickstart your weight loss journey with minimal equipment and zero intimidation? This comprehensive guide introduces the ultimate 10-minute resistance band workout for beginners, designed for rapid fat loss, improved strength, and growing confidence, all from the comfort of your home. Whether you are new to fitness or returning after a break, resistance bands offer a safe, affordable, and effective way to torch calories and sculpt your body.
In this article, you'll discover a beginner-friendly resistance band circuit, expert coaching cues, common mistakes to avoid, advanced tips, pros and cons, FAQs, and much more. Let's turn those bands into your personal fat-blasting powerhouse!
Why Use Resistance Bands for Weight Loss?
Resistance bands are not just a fad—they're a scientifically backed tool for strength training and metabolic conditioning. Incorporating resistance bands into your fitness routine provides numerous benefits, especially for beginners looking to lose weight quickly and safely:
- Versatility: Target every muscle group with countless exercise variations.
- Low Impact: Reduce joint stress and risk of injury compared to traditional weights.
- Budget-Friendly: Affordable, portable, and easy to store anywhere.
- Progressive Resistance: Suitable for all levels—simply switch band thickness for more or less challenge.
- Boosts Metabolism: Performing circuit workouts keeps your heart rate elevated for maximum calorie burn.
Benefits of Resistance Band Workouts for Beginners
- Enhances muscle tone and functional strength
- Improves mobility, coordination, and balance
- Prevents plateaus by introducing variety
- Ideal for those with limited space or gym access
10-Min Beginner Resistance Band Workout Routine Overview

Below is a fast, effective resistance band workout circuit tailored for beginners aiming for quick fat loss. All you need is a loop or flat resistance band and a little floor space. Perform each move back-to-back, with minimal rest between movements. Once you've completed all exercises, rest for 60 seconds and repeat the circuit once or twice based on your fitness level.
| Exercise | Band Placement | Reps/Time | Primary Muscles |
|---|---|---|---|
| Squat to Press | Under feet + hands gripping handles | 12-15 reps | Glutes, shoulders, quads, core |
| Standing Row | Under feet + handles in hands | 12-15 reps | Upper back, biceps |
| Band Push-Ups | Band across upper back, ends under palms | 10-12 reps | Chest, triceps, shoulders |
| Glute Bridge | Band across hips, anchored under feet | 15-20 reps | Glutes, hamstrings, lower back |
| Standing Side Steps | Around ankles or above knees | 30 sec (each side) | Hips, outer thighs, glutes |
| Banded Dead Bug | Band held in hands, anchored over knees | 10 reps (each side) | Core, hip flexors, shoulders |
How to Perform Each Exercise: Step-by-Step Instructions
1. Squat to Press
- Stand on the middle of the band with feet shoulder-width apart.
- Hold the ends or handles at shoulder height, palms facing inward.
- Lower into a squat, keeping chest up and knees behind toes.
- As you stand up, press the band overhead into a shoulder press.
- Lower hands to shoulders and repeat.
2. Standing Band Row
- Stand on the band, feet about hip-width apart.
- Hold band ends with palms facing each other, arms extended in front.
- Pull hands toward your ribcage, squeezing shoulder blades together.
- Pause, then slowly extend arms forward and repeat.
3. Band Push-Ups
- Loop band across your back, holding ends below your palms as you get into push-up position.
- Engage your core, keeping your body in a straight line.
- Lower your chest to the floor, keeping elbows close to your body.
- Push up explosively—band will provide extra resistance at the top.
4. Glute Bridge
- Lie on your back, feet on the floor, knees bent.
- Place the band over your hips and hold ends to floor with hands or loop band under feet.
- Drive through heels, lifting hips until knees, hips, and shoulders form a straight line.
- Squeeze glutes at the top, then lower hips and repeat.
5. Standing Side Steps
- Place band around your thighs (above knees) or ankles.
- Slightly bend knees, keeping chest up and core tight.
- Step to the right, pushing against band resistance, then bring left foot to meet right.
- Repeat for desired time, then switch direction.
6. Banded Dead Bug
- Lie on your back, arms extended to the ceiling, knees bent at 90° (tabletop).
- Hold the band taut between hands and anchor over knees.
- Slowly lower right arm and left leg toward floor, keeping core engaged.
- Return to starting position and switch sides.
Weekly Plan: How Often to Do This Workout

For optimal fat loss and fitness results, aim to complete this 10-minute routine at least 3-4 times per week. Combine it with regular walking, interval cardio, or other forms of movement for faster results.
| Day | Activity |
|---|---|
| Monday | 10-min Resistance Band Circuit + 20-min Brisk Walk |
| Tuesday | Yoga or Stretch |
| Wednesday | 10-min Resistance Band Circuit + Core Training |
| Thursday | Rest or Light Cardio |
| Friday | 10-min Resistance Band Circuit + 10-min HIIT |
| Saturday | Active Recovery or Family Walk |
| Sunday | Rest |
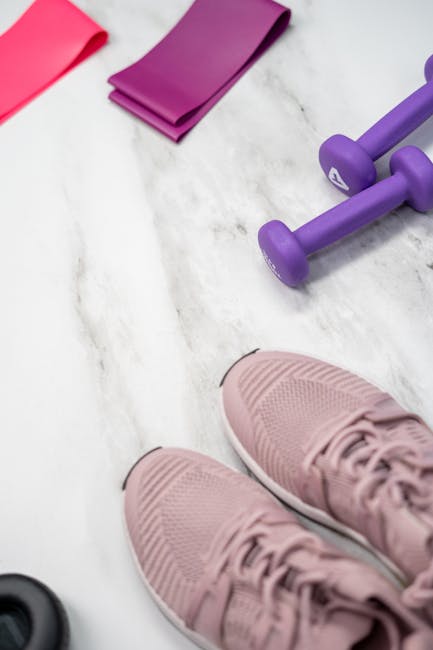
Resistance Bands: Types and Which to Choose for Beginners
Resistance bands come in various shapes, lengths, and resistance levels. As a beginner, selecting the right type of band is key to ensuring safety, comfort, and progress.
Types of Resistance Bands
- Loop Bands: Closed circular bands, great for lower body and mobility drills.
- Tubing Bands with Handles: Ideal for mimicking dumbbell/barbell moves like rows and presses.
- Flat Therapy Bands: Wide, versatile bands often used for rehab and gentle total-body work.
- Figure 8 Bands: Shaped like an eight; easy to grip and great for upper body isolation.
Choosing Band Resistance Level
- For most beginners, start with light to medium bands.
- As you get stronger, gradually increase to heavier bands.
- Multicolor sets often provide options for easy resistance progression.
Beginner Mistakes to Avoid
Starting with resistance bands is safe and simple, but beginners often make common errors that can stall progress or lead to frustration. Watch out for these pitfalls:
- Skipping Warm-up: Always warm up 5 minutes prior (e.g., jumping jacks, arm circles).
- Poor Posture: Don’t hunch your back or let knees cave in. Stand tall with core engaged.
- Going Too Heavy: Start with a lighter band to master technique before increasing resistance.
- Rushing Through Reps: Move steadily and with control to keep muscles under tension.
- Neglecting Breathing: Exhale during exertion (push/pull), inhale during lowering phase.
- Not Anchoring Bands Securely: Always step in the center or anchor properly to avoid snapbacks.
Pros and Cons of Resistance Band Workouts for Weight Loss
Pros
- Highly portable—work out anywhere
- Extremely joint friendly
- Beginner to advanced progression available
- Cost effective
- Excellent for metabolic conditioning and full-body strength
- Minimal risk of heavy weight-related injuries
- Easy to superset and increase workout intensity
Cons
- Limited maximum resistance compared to gym equipment
- May fray, tear, or wear out over time
- Requires periodic purchase/replacement as you progress
- Anchoring for some moves can be tricky in limited spaces
- Sometimes less "feel" compared to free weights for certain advanced lifts
Advanced Tips as You Progress
- Increase to 3-4 rounds per session as your fitness level improves.
- Add short bursts of cardio (jumping jacks, mountain climbers) between band exercises for higher calorie burn.
- Experiment with single-limb (unilateral) variations to increase challenge and correct imbalances.
- Slow down the eccentric (lowering) portion of each move for more muscle tension.
- Alternate resistance bands of varying thickness to constantly challenge muscles.
- Combine bands with bodyweight and dumbbell exercises as you get stronger.
FAQ: Beginner Resistance Band Workouts for Weight Loss
Q1: Can resistance bands help me lose weight fast?
A: Absolutely. Bands elevate heart rate and build lean muscle simultaneously, which boosts metabolism. Pair workouts with a calorie-controlled diet for rapid results.
Q2: How many calories can I burn in a 10-minute resistance band workout?
A: A 10-minute circuit can burn 60-120 calories, depending on your intensity and individual weight. With increased muscle activation, you’ll continue burning calories even after finishing.
Q3: How often should beginners train with resistance bands?
A: Aim for 3-5 sessions per week. Recovery is key, so always listen to your body and rest as needed.
Q4: Are bands safe for people with joint pain or past injuries?
A: Yes! Resistance bands are gentle on joints and widely used in rehabilitation. However, consult with your healthcare provider before starting any new fitness program, especially with pre-existing conditions.
Q5: How soon will I notice weight loss?
A: With consistent exercise and healthy nutrition, you may start noticing results in 2-4 weeks. Remember, muscle gain and fat loss often happen together, so celebrate improved strength and energy as progress!
Q6: What else can I do to speed up weight loss?
A: Combine resistance band circuits with daily walking, interval training, balanced nutrition, plenty of water, and regular sleep for the fastest, healthiest fat loss.
Q7: How do I know if I’ve chosen the right band resistance?
A: Your last 2-3 reps of each set should feel challenging but doable with good form. If you breeze through, try a thicker (heavier) band next time.
Q8: Can resistance bands replace the gym?
A: For many, yes! Bands offer comprehensive workouts for strength, conditioning, and flexibility—especially for those with limited space, time, or equipment.
Sample Variations: Customizing Your 10-Minute Routine
Keep your workouts fun and effective by mixing up moves every 1-2 weeks. Here are a few simple swaps:
- Lunges with Band Row: Step back into a lunge while rowing band with arms.
- Standing Chest Press: Anchor band behind you (door anchor or pole), press forward.
- Band Pull Apart: Hold band at shoulder level, arms extended. Pull hands apart to squeeze upper back.
- High-Knee Band Marches: Step on band, palms at shoulders. March high knees, pressing band up each time.
- Banded Good Morning: Stand on band, loop over shoulders, hinge at hips, then return up.
How to Track Progress and Stay Motivated
- Take body measurements every two weeks (waist, hips, arms, thighs).
- Record weight weekly but don’t obsess over the scale—focus on how clothes fit and energy levels improve.
- Note how many reps or rounds you can complete as endurance builds.
- Set mini-goals (e.g., add an extra round, use a thicker band).
- Reward yourself with non-food treats (new bands, activewear, spa day) for consistency.
Key Takeaways: Start Your Band Journey Today!
- Consistency is more important than perfection—aim for at least 3 circuits per week.
- Good form beats heavy resistance—master each move, then progress intensity.
- Pair your workouts with smart nutrition and lifestyle habits for the best weight loss results.
- Resistance bands are affordable, convenient, and effective for all fitness levels.
- Over time, as you get stronger, your confidence and athletic ability will soar!
Try this 10-minute resistance band workout for beginners today and start your transformation. Your fitness journey doesn’t need to be complicated—you just need the right tools, the right plan, and the dedication to show up!
Disclaimer: Always consult your medical professional before starting any new exercise program, especially if you have any pre-existing conditions or injuries.
```
Post a Comment